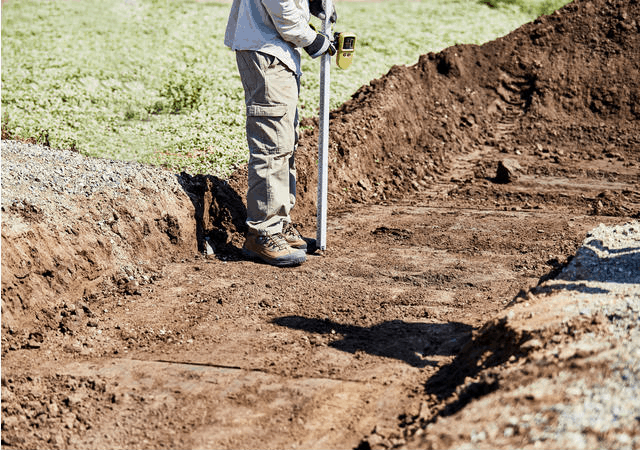
Grading is a standard process. It is performed before any renovation or construction work to help to even the surface and to build a strong foundation.
Proper classification, helps in restricting the flow of water which flows towards any new foundation. It does not allow the standing water flowing into the property, so it results in securing the foundation.
In case of the foundations which exist, grading performs to improve the level of a drainage system which is existing.
Why Should One Use a Rotary Laser Level for Grading?
In case of establishing grades either for building or landscaping, there is nothing better than using laser levels.
Because the results of a number of a construction project depend on things such as pipe laying, grading, and excavation. It depends on the result accuracy. Any erroneous results can be a massive threat to the foundation because a laser level helps the construction level much.
A powerful rotary laser level is very best for grade shooting and many other construction outdoor projects. Rotary laser levels are less expensive in comparison to any different laser level. This is the main reason why the majority of people are showing their interest in buying this for common household uses, but if you want to perform the task successfully, you must know how to use a rotary laser level for grading.
Things Needed for Grading:
For grading, a few things are mandatory, such as Rotary Laser Level, Tripod, Grade Rod, and Laser Detector.
How to Use a Laser Level for Grading - The Process

Step 1 - Set the laser on the tripod
It is essential to place the tripod on a firm ground which should be dry, on the construction site, and it is also essential to spread the legs (Three) over the tripod, where the distance of the legs should be equal to each other. Press the pin of the tripod very firmly on the ground, only unless it does not trip over and damage the laser levels. For accurate and best results, the tripod must be set up on the ground firmly.
Step 2 - Turn the laser level on
The next step is to check the stability of the tripod and mount the level of laser on the tripod. It helps the laser level up. If anybody is using a self-leveling level of laser, then it is essential to buy some time to allow the self-leveling level to settle.
Step 3 - Find the initial height, where one needs the exact height
With the help of experts, place the bottom of the rod of the grade at any desired height which one has decided according to his or her needs and wants.
Step 4 - Usage of a laser detector to help detect the laser beam
Make a shot with the help of the laser beam at that very point, asking the assistant to properly adjust or readjust the position of that laser detector which eventually needs to get connected to the laser beam.
Step 5 - Adjusting the laser detector
The advantage is that the laser detector can be adjusted easily by moving it up, down, left or right. However, once the beep sound is heard when can’t adjust the fever or as that gives a signal to stop. In case if the detector is very low or high, it produces an interrupted sound of beep instead of the constant sound of the beep.
Step 6 - Place the grade rod at varied locations of the construction site
Before placing the grade rod, it is essential to check the ground, whether it is very high or low or is above or below the desired point. Accordingly, one will need to dig inside the ground or lift the ground to get original hands-on reading.
Conclusion
Hence, proper grading at construction sites becomes essential, which leads to the formation of strong foundation level. However, in such a task, accuracy plays an important role which is one of the major concerns.
While working with laser levels at the outdoor sites, it is essential to follow every rule and wear all the safety gadgets, especially when an individual is receiving the reading while using the laser detector.
